Beehive Scanning
Beehive scanning enables your workers to be organized into seperate search areas. This allows you to scan a larger area than by just increasing your -st alone. Beehive scanning still allows for -speed, however, the worker(s) will be split into seperate areas.
Option #1: Intergrated beehive
PRO: Quicker Deployment
PRO: Less Memory usage
CON: Less Flexibility
CON: Limited to 1 Beehive per RM instance
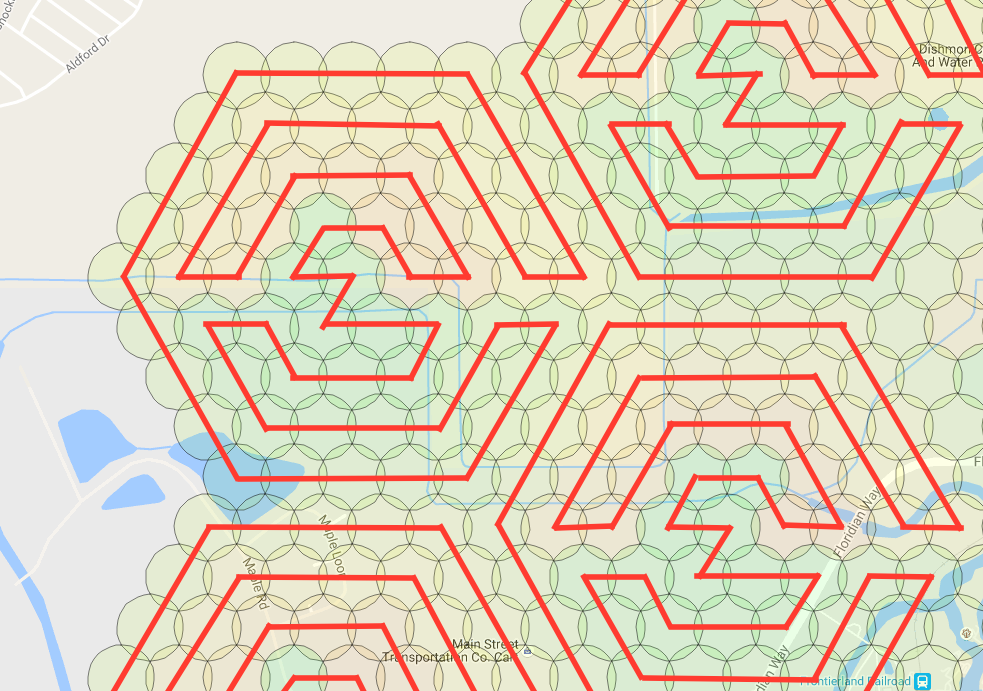
Example of walking path assignments with 1 wph.
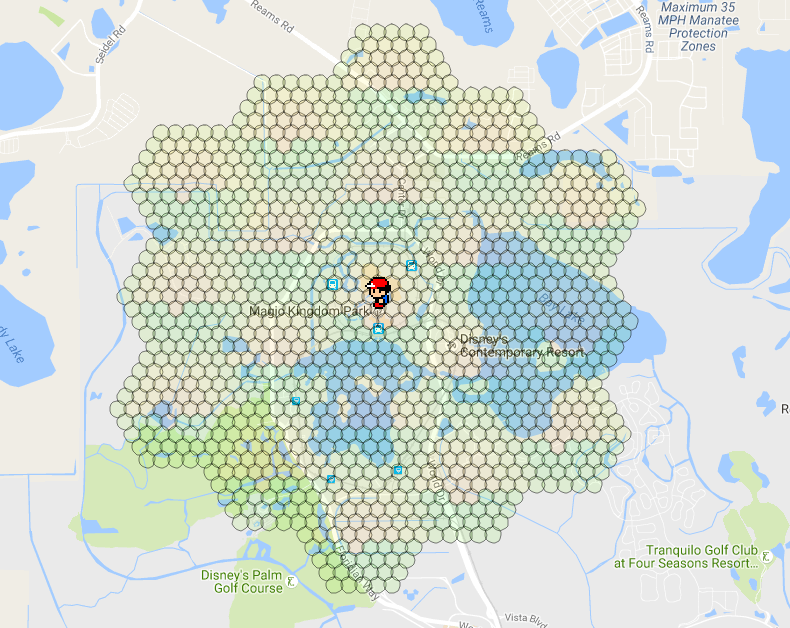
Command line option -bh or --beehive enables your workers to be organized into 1 search area per worker by default. The beehive will automatically center around your specified location -l and spirials out from there. This method uses the -st to determine the size of each hive. You increase the number of hives by adding more workers -w. You can also add more than one worker per a hive. For example, you can place two workers in a hive by using -wph 2. NOTE: Adding more than 1 worker per hive is only reccomended if you are using speed scheduler.
For each -w, you must have at least account one account. It is best to have at least 4 accounts per worker. This will allow your workers to always be working, no matter if the account encounters an error. It is also always a great idea to set an Account Search Interval -asi. This will limit each account to a certain ammount of search time before putting it to sleep. You can control the ammount of sleep with Account Rest Interval -ari.
Command line example:
python runserver.py -ac accounts.csv -bh -st 5 -w 31 -l "Nashville, TN"
Using -ns and -os
Even though -bh will only allow 1 beehive. You can add additional hives by starting a 2nd RocketMap instance with the flag -ns. This starts the searchers without starting another webserver. You can run as many instances with -ns as your server can keep up with. If all your instances are running -ns you will also want to start an instance with -os. This will start only the webserver. This becomes useful if you begin to seperate your RM instances across several copmuters all linked to the same database.
Option #2: Use the RM Multi Location tool.
PRO: TONS of Flexibility
PRO: As many hives as your set up will allow!
CON: Uses A LOT More Memory
CON: Not as easy to make quick changes.
Get Ready
The beehive script works by specifying only the parameters that are different for each worker on the command line. All other parameters are taken from the config file.
To ensure that your beehive will run correctly, first make sure that you have setup your config.ini with the appropriate settings.
You will want the following to run optimial beehives: MySQL Captcha Solving (manual or 2captcha) possibly a few proxies
Get Set
Select the areas in which you want to scan. Keep in mind the more areas you select the more workers you will need.
Once you have the areas ready, select Generate Launch Script
You will select the options for your setup and decide how many workers per hive.
After your scanning preferences are set, you will download the script.
Please Note: By default, it will look in the folder workers for accounts to use. For every hive you have you must also have have a CSV named HIVE{number}.csv. Please do not put a account in more than one CSV as it might cause unwanted effects.
CSV format example:
ptc,username,password
GO!
Run the .bat/.sh file to start the workers.
Troubleshooting
If your instances start but then immediately stop, take each line and run the part after /MIN starting with the python path. This will stop the window from automatically closing so that you can see what the actual error is.
Distances
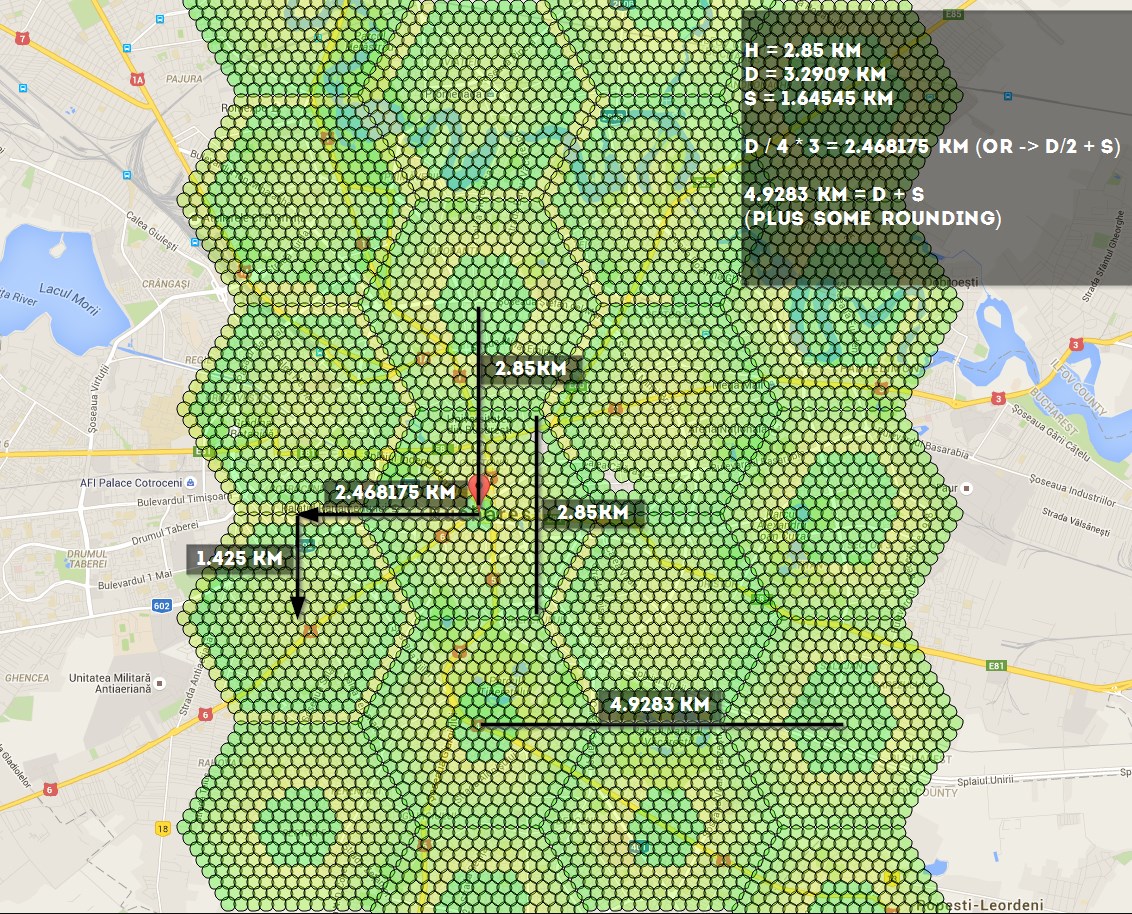
if using -st 10, these are the numbers you should know: 4.9283 km, 1.425 km, 2.468175 km, 2.85 km - you can use the distances to calculate coords here http://www.sunearthtools.com/tools/distance.php